Blender Interface
Link to tutorial as google doc
Blender Into
Blender is an open source 3d graphics software.
DON’T PANIC
 Blender Infographic from Giuliano DANSKY D’Angelo — GIUDANSKY.COM
Objective
This is a simple tutorial meant for a one hour session on 3/11/19. This tutorial only is meant to give a simple overview of the software and how to navigate and use the 3d view interface.
This tutorial will be using blender 2.79b
For more in-depth tutorials, try following:
- Blender’s Blender Fundamentals for a more detailed explanation of how to use blender
- Blender Guru’s Blender Beginner Tutorial Series for an intro to 3d modeling and using blender
- Games From Scratch’s Complete Blender Game Art Tutorial as a fully text based tutorial
- Looking up any problem that you have on reddit, forums, google, youtube until you find what you need.
I learned blender on a tutorial that was written in 2013 from Neal Hirsig and is still online https://vimeo.com/channels/blendervideotutorials. This was a project based tutorial to learn 3d modeling and I enjoyed this method the best. Any tutorial can work no matter how old it may seem because all the principles stay the same, only some widgets and tools will change along the way.
Learning blender and 3d modeling will take time and is well worth pursuing on your own.
Overview of 3D
When making a 3d model, there are a few key aspects that need to be kept in mind.
- Modeling - the shape of an object
- Texturing - how an object looks
- Lighting - what parts are seen and what shadows are cast
We will be going over the simple modeling and manipulating objects in this tutorial.
Setup
Blender runs on almost any operating system (you can download and compile the source if you cannot find a precompiled version for your system even). To download blender go to their download’s page: https://www.blender.org/download/.
When using blender, there are two major things you will want
- A mouse with a scroll wheel
- Keyboard with number pad (not necessary)
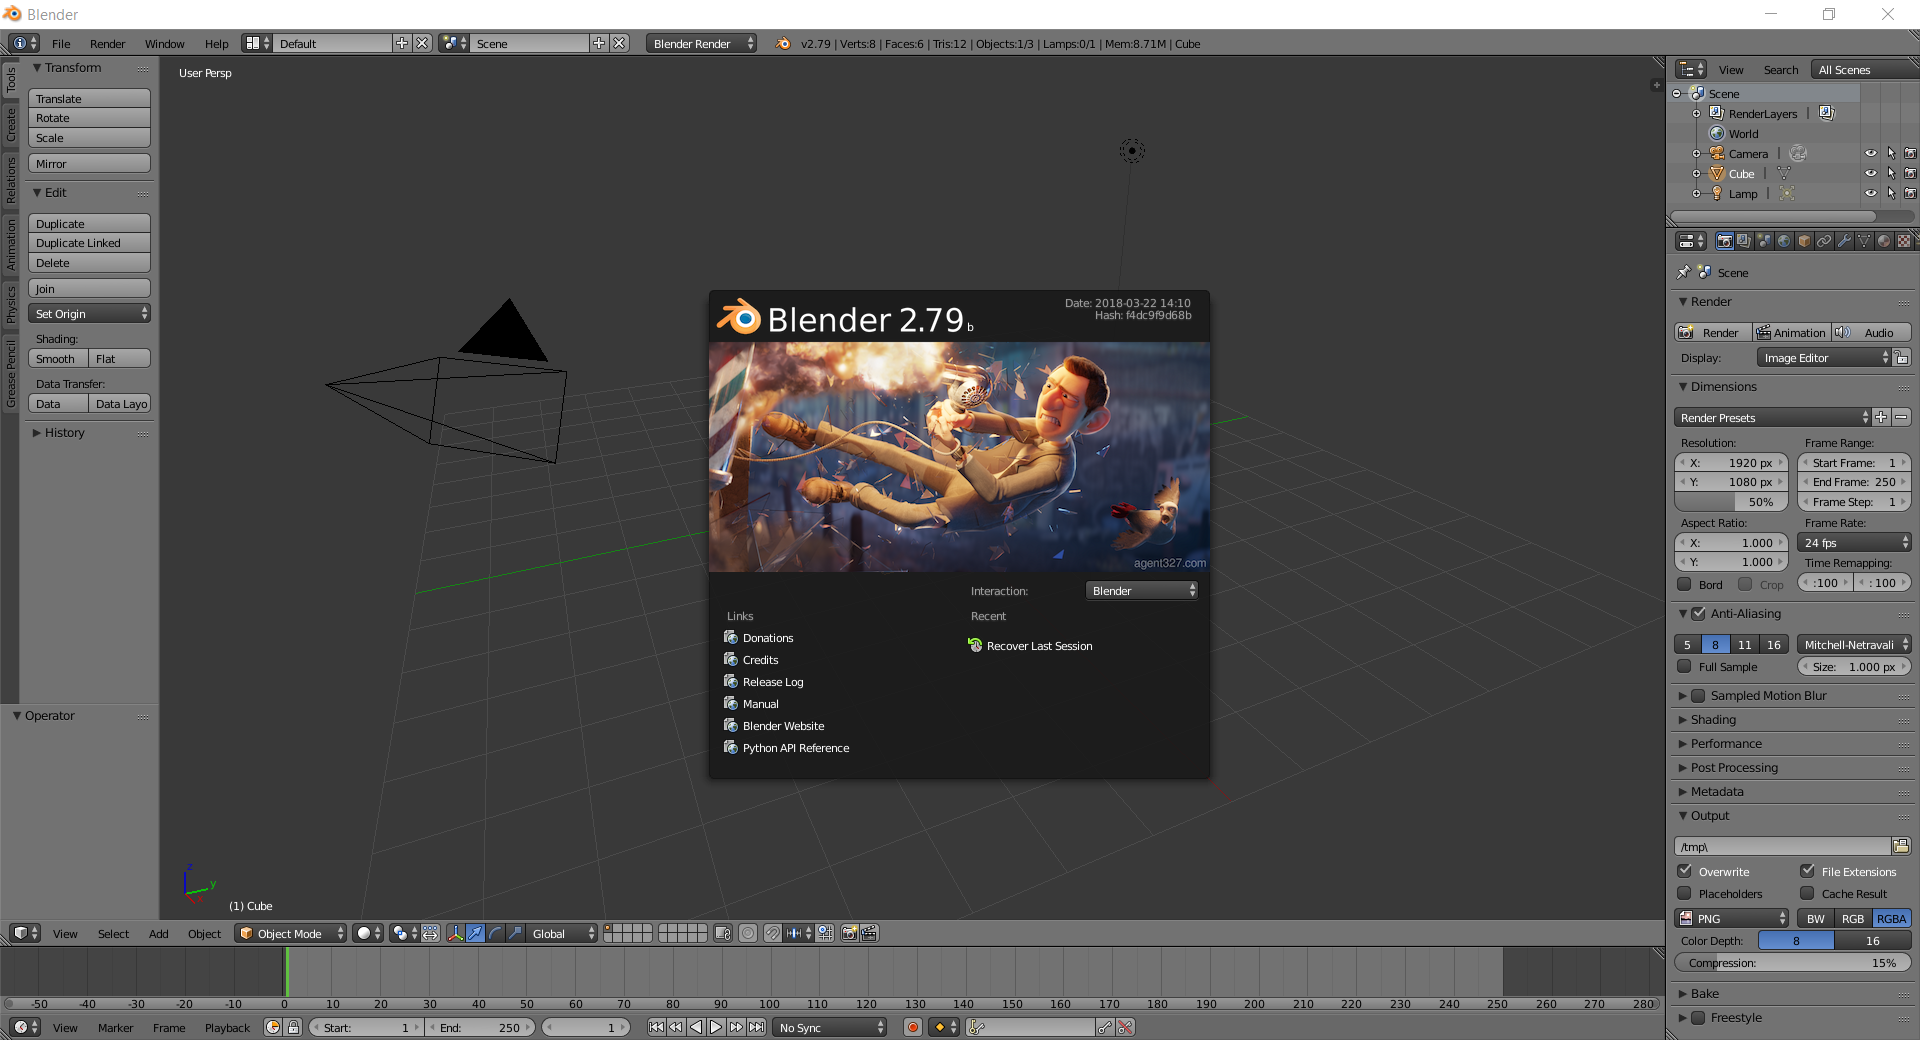
Follow the instructions for the install and once it’s done and launched you should see a screen like this.
Extra Setup for Laptop
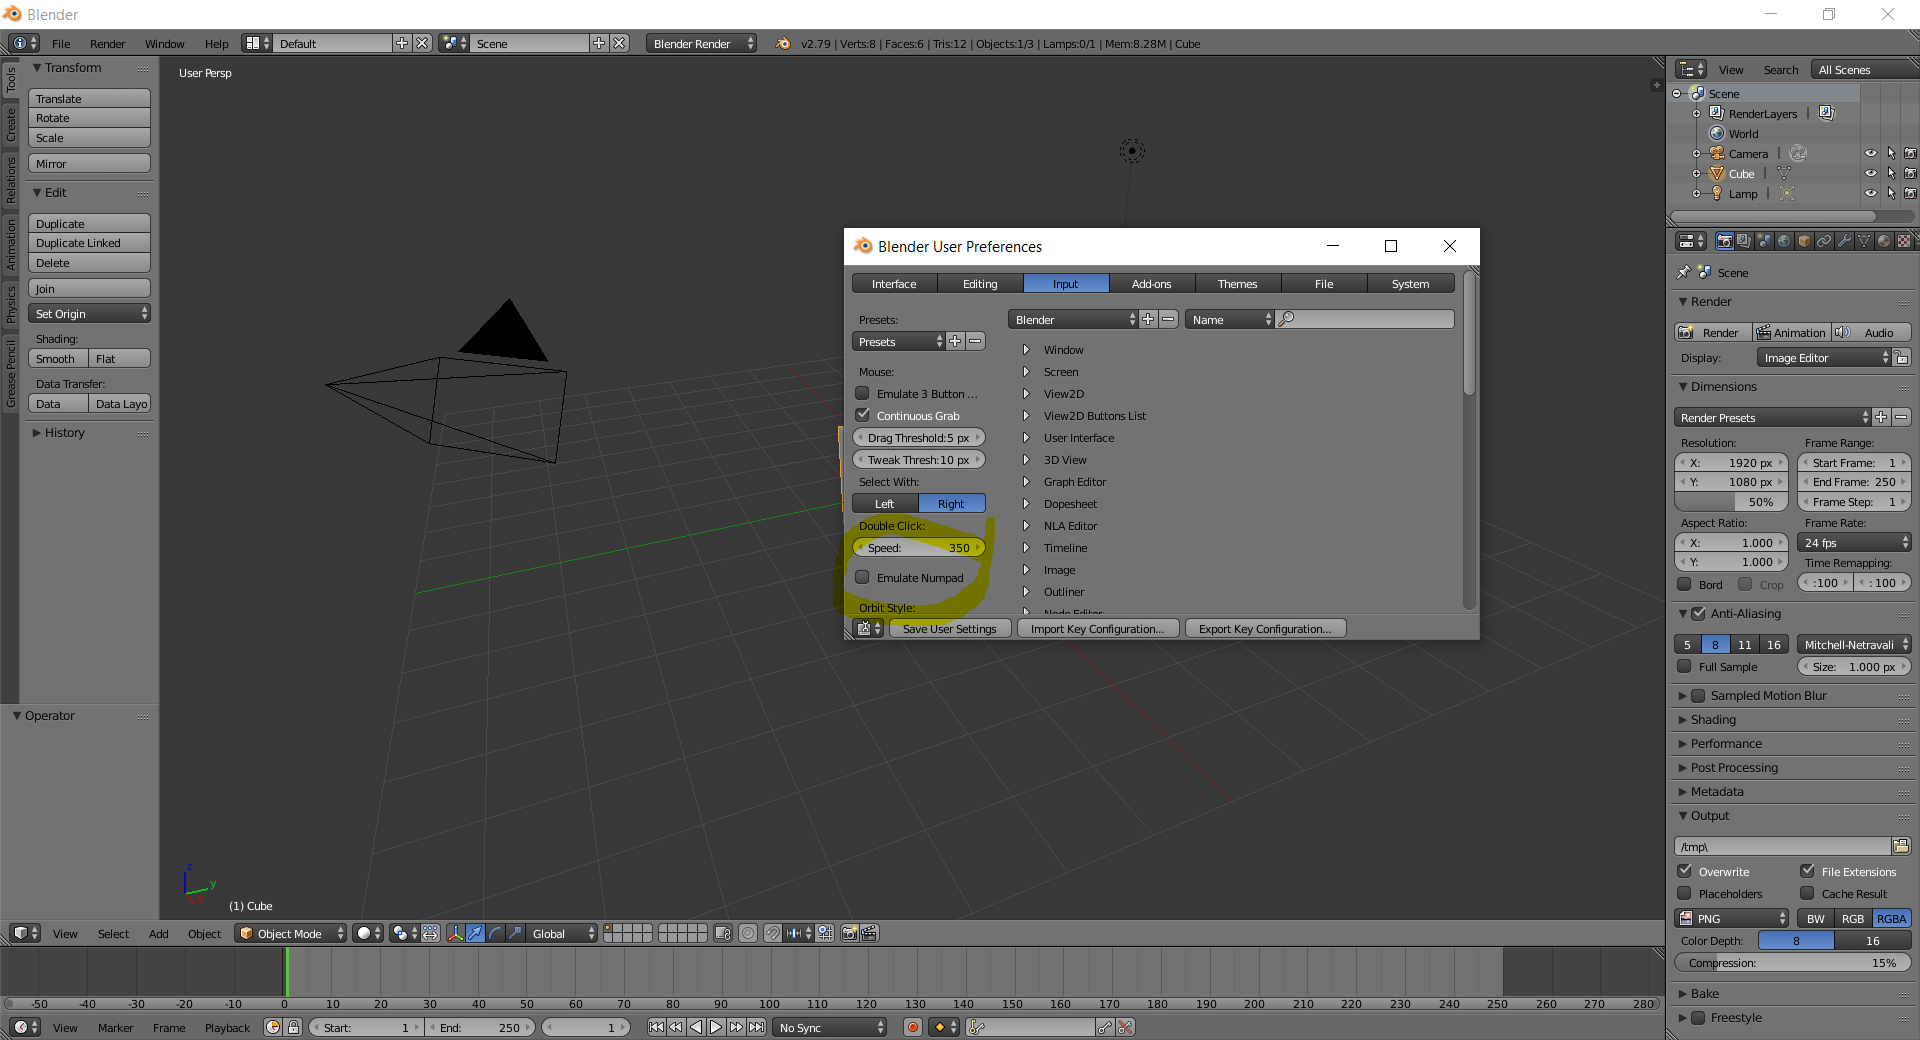
If your computer does not have a number pad, navigate in the top left menu to File then select User Preferences
This will open up the user preferences panel. From this select ‘Input’ as the sub menu and then click the box next to ‘emulate numpad’ (left side) and a check mark will appear showing that this setting has been activated. Once this is done click ‘Save User Settings’ on the bottom of the menu and you will have activated the number keys to act as your emulated number pad.
File > User Preferences > Input > emulate numpad
Interface
Don’t panic, blender seems a bit strange but has all the tools you need for any 3d graphics software.
The window is an adjustable interface and the default workspace layout is good for modeling and editing software. The interface is composed of a few different areas. These areas are how you can interact with your blender environment file.
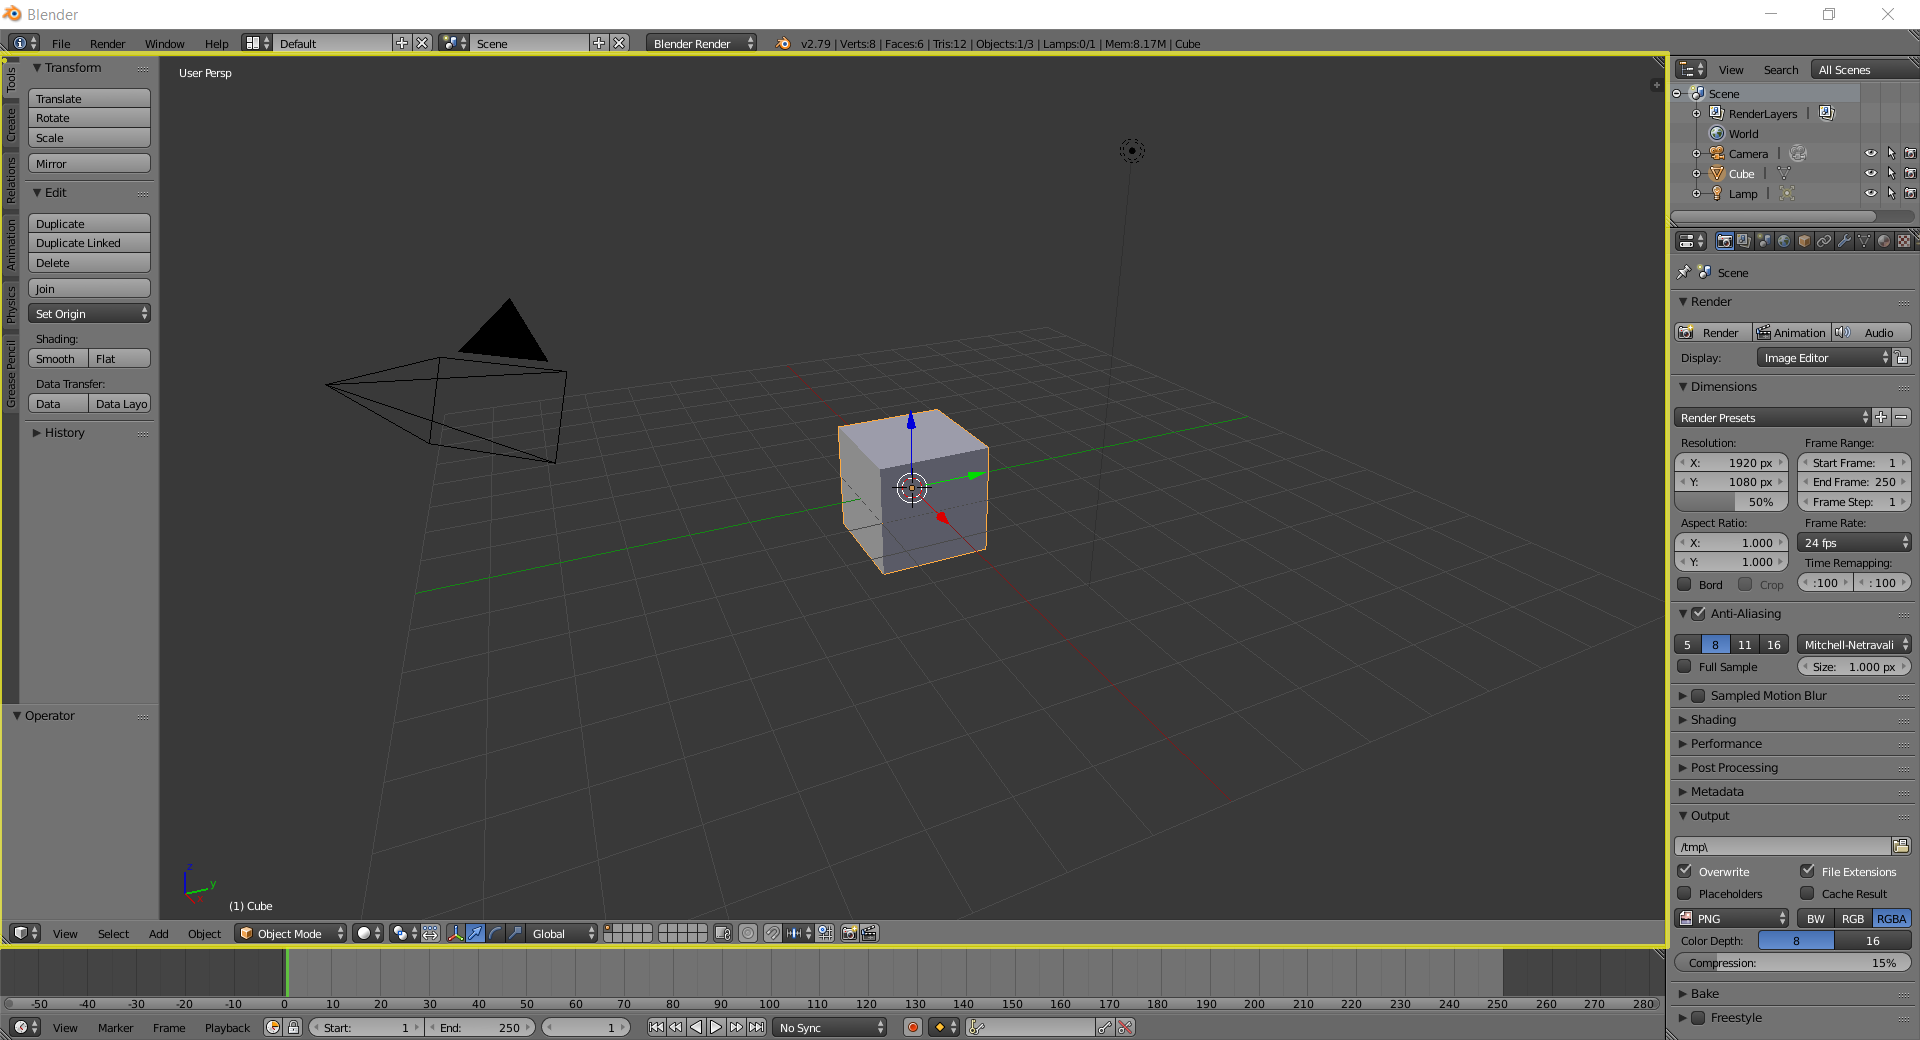
I have highlighted the “3d view” area in the image above. We will just be going over this area for the purposes of this tutorial.
Basic controls for 3d view
| Button | Action |
|---|---|
| Middle mouse button | Orbit around focal point |
| Middle mouse button + shift | Move left/right or up/down |
| Scroll wheel | zoom in (scroll up) or out (scroll down) on focal point |
| Left click | move 3d cursor |
| Right click | select object |
| Period on number pad | focus on selected object. |
| z | toggle wireframe mode |
The number pad can change the view angle of the screen (very helpful if you’re like me and get lost in a scene)
Number pad actions
| Button | Action |
|---|---|
| 5 | toggle isometric view |
| 1 | front view |
| Ctrl + 1 | right view |
| 3 | right view |
| Ctrl + 3 | left view |
| 7 | top view |
| Ctrl + 7 | bottom view |
| 0 | camera view |
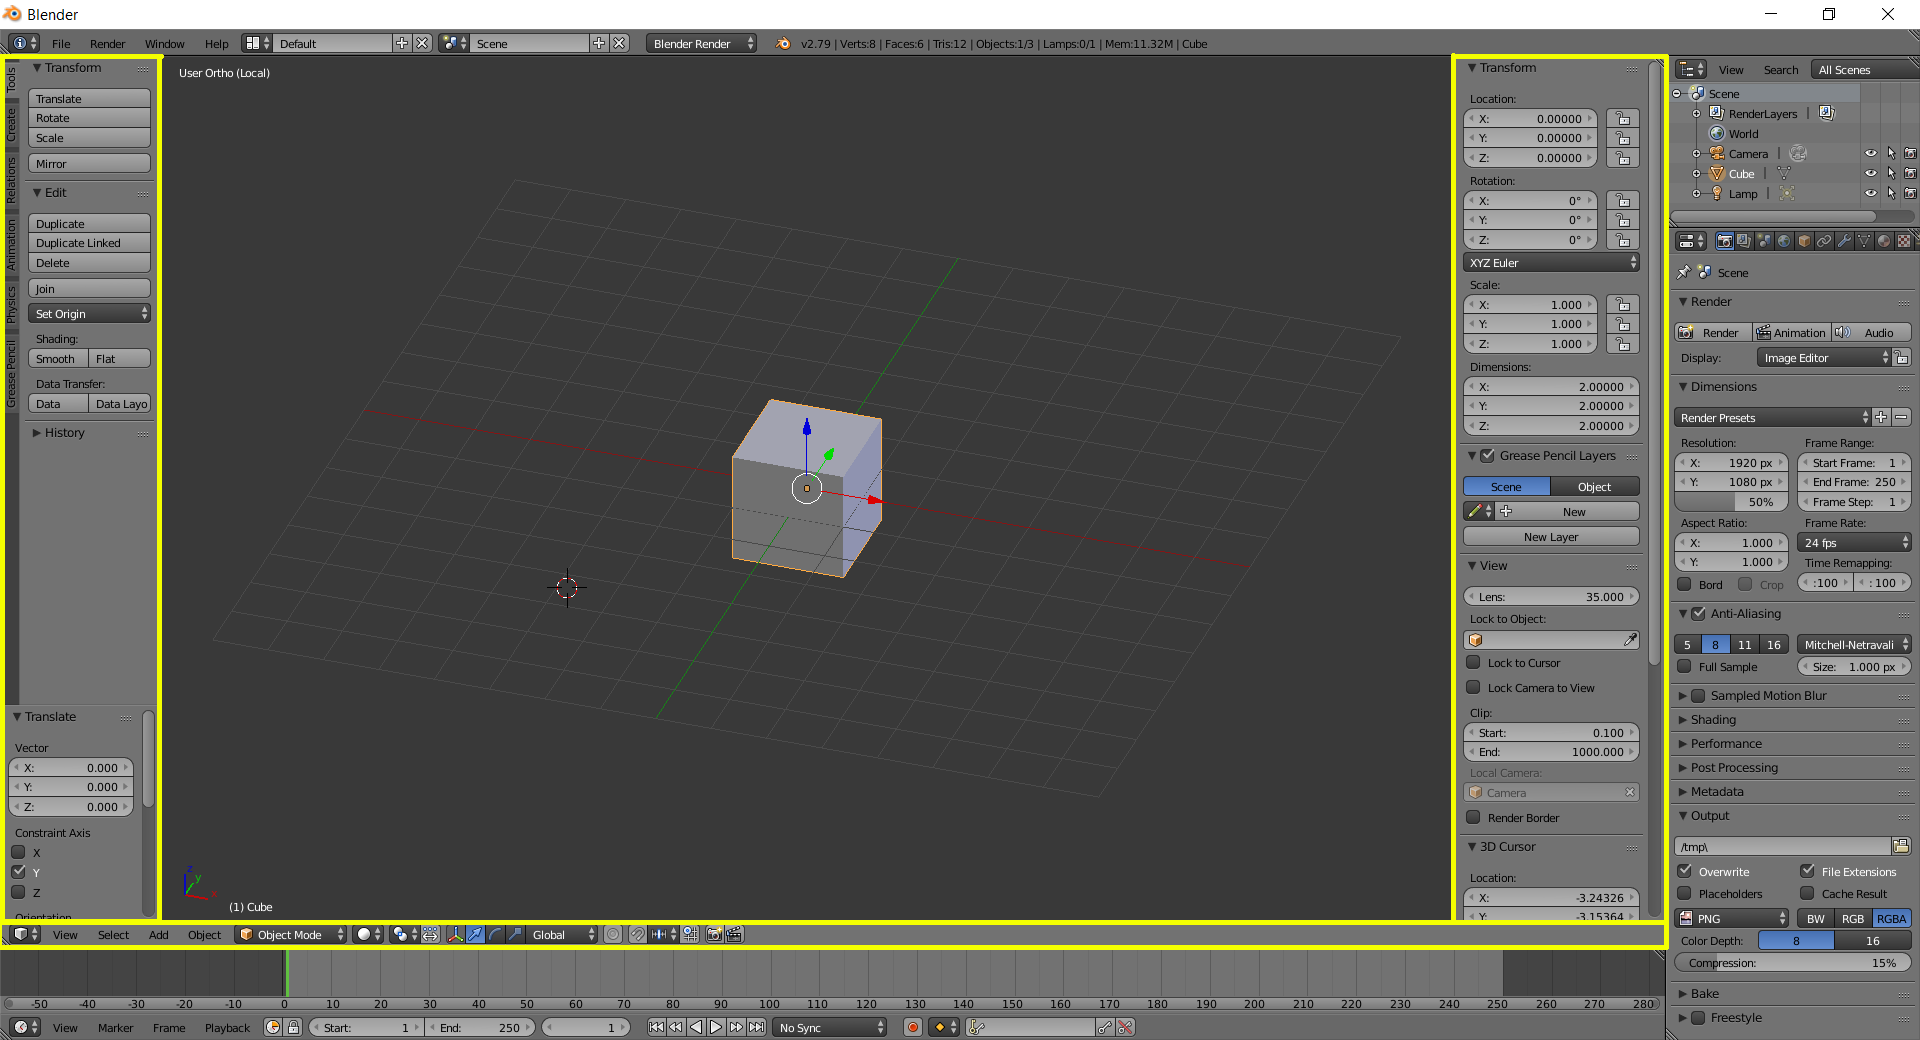
The 3d view area also has two panels (on the sides) and a header (bottom box) highlighted in the image above. These boxes will show all the information relating to the current scene and selected object.
Any of these panels can be opened by clicking the plus button on the side of the view or closed by dragging them shut with the mouse. These panels can also be toggled by pressing t for the toolbar panel (left side) or n for the properties panel (right side)
Each of these panels can be scrolled up or down to view all the options for each panel.
Selecting Objects
While in the 3d view area, you can interact with objects in the scene by selecting and moving them.
To select an object, right click (not left click) on the object. When an object is selected it will have an orange outline and a manipulator tool will appear.
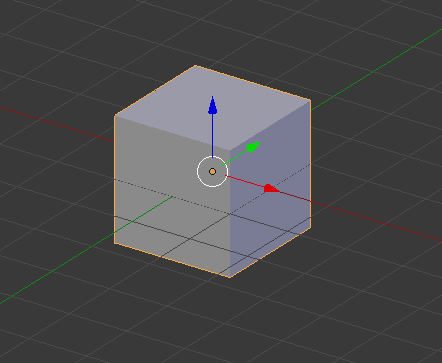
There is a lot of information in that small space. The manipulator will have a central dot. This is the origin of the selected object. The three arrows are widgets to translate the object in the X (red) Y (green) or Z (blue) axis. If ever need a reference for these directions there is a small widget in the bottom left of the 3d view area that shows the current positive x, y and z directions.
Left clicking on the screen will move the 3d cursor (shown by the red, white circle with a small black cross hair). The 3d cursor is important for interacting with the scene and manipulating objects.
If there are multiple objects in the scene, you can select multiple objects by right clicking an object then holding shift and selecting then right clicking on the next object. When you add a new object it will gain an orange outline and the other selected objects will have a red outline. Selecting a red outlined object while holding shift will make it the active (orange outlined) object and selecting the active object while holding shift again will deselect this object.
(I am holding shift and right clicking in this animation)
To toggle select all, simply press a (no other buttons). This will toggle selecting all objects or selecting none of the objects in the current scene.
Other tools to select objects are the box select tool and the circle select tool.
Box Select

Box select is opened by pressing b, then this will bring up a cursor. With the cursor, use the left mouse button to drag the box of desired items and this will add the items to the current selection. If you use the middle mouse button, you will deselect the items in the box. The right mouse button will cancel the current box command.
| Button | Action |
|---|---|
| Left mouse button | select objects |
| Middle mouse button | deselect objects |
| Right mouse button | cancel action |
Circle Select
Circle select works similarly to box select except the cursor is a circle and works more like a paintbrush. Open circle select by pressing c. Left clicking will add objects, middle mouse button will deselect objects, right clicking will cancel. You can use the mouse wheel to increase or decrease the size of the circle.
| Button | Action |
|---|---|
| Left mouse button | select objects |
| Middle mouse button | deselect objects |
| Scroll wheel | change size of circle |
| Right mouse button | cancel action |
Transforming Objects
Translating objects is very useful in blender. To translate a selected object, you can use the transform widget by selecting one of the arrows with left click and moving the object along that axis. You can also right click on the selected object and drag the object across the screen in the current plane of view.
Instead of the widgets, you can also use hotkeys to move the objects. Left click to confirm any transformation, and right click to cancel the current action.
| Button | Action |
|---|---|
| g | grab object (same as right clicking) |
| r | rotate object along viewplan |
| s | scale an object |
| Alt + g | reset location |
| Alt + r | reset rotation |
| Alt + s | reset scale of an object |
| g + x | translate along x axis |
| g + y | translate along y axis |
| g + z | translate along z axis |
| r + x | rotate along x axis |
| r + y | rotate along y axis |
| r + z | rotate along z axis |
| s + x | scale along x axis |
| s + y | scale along y axis |
| s + z | scale along z axis |
| g + x + x | translate along relative x axis (if object is rotated) |
| g + y + y | translate along relative y axis (if object is rotated) |
| g + z + z | translate along relative z axis (if object is rotated) |
| r + x + x | rotate along relative x axis |
| r + y + y | rotate along relative y axis |
| r + z + z | rotate along relative z axis |
| s + x + x | scale along relative x axis |
| s + y + y | scale along relative y axis |
| s + z + z | scale along relative z axis |
There are additional widgets for scale and rotation that can be selected at the bottom of the screen as the cursor, curve and diamond objects.
Adding and Deleting Objects

To delete an object, select an object, then press x to open the delete menu. Once this menu is open, the delete option can be selected to remove the object form the scene. Instead of left clicking, you can also press enter to achieve the same action. Another way to complete this is to press delete then hit enter.
To add a primitive to a scene, use the hotkey shift + a to open the add menu. The basic objects are meshes. If you select a mesh it will add a mesh at the 3d cursor. To move the 3d cursor left click.
You can also press t (or click the plus on the left) to open the toolbar panel (left side) to add other objects under the create menu with the same options as before.
Layers and Visibility
You can use h with a selected objects to hide the object. You can also use Alt + h to unhide all objects.
The hierarchical outline view of the scene in the top right lets you select view objects are visible. The eye icon (third from the right column).
Layers are also used to organize objects. This concept is also found in tools like photoshop or GIMP. The layer selection grid is in the bottom middle of the 3D view panel.
Selecting a square in the grid selects that layer as visible. Holding shift while selecting a square selects multiple layers. If you do not have the emulated numpad activated, you can use the numbers on the keyboard to change between the layer and Alt + numbers to change between the second set of layers.
If an object is selected, you can use the hotkey m to move the selected object to another layer. If you do not have the enumerated numpad activated, you can use the numbers on the keyboard to select a layer to move the object to or Alt + numbers to select a layer in the second set of layers.
If a layer contains your selected object it will have an orange dot in the square. If a layer contains any object it will have a dark grey dot in the square. Layers do not hide objects but achieve a similar effect to a user. Using the h and Alt + h hotkeys will only affect objects on the current layer. You can only interact with objects in the current layer.
Layers are a very powerful tool for organizing a scene.
Menus
There is a multitude of other menus in blender, here is a basic overview of the other menus in the default view.
Other Menus
There are other menus in the bottom left area of the screen. There is a set of tabs (icons) on the top of the area and they are described below. If you cannot see all the objects, hold the middle mouse button on the tabs and move the cursor left or right to see more tabs.
These tabs are not necessary for understanding basic blender, just useful for understand the basic overview of the software and what might be referred to in other tutorials
| Panel | Icon | Description |
|---|---|---|
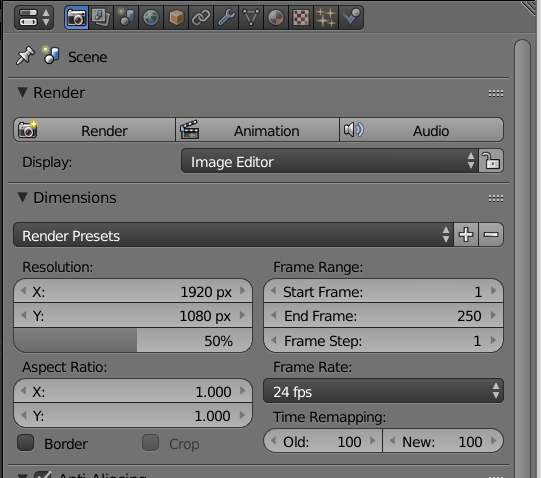
| Render | Camera | Handles rendering settings for the scene. |
| Render layers | Picture | Determine how the scene is rendered (not as important for now) |
| Scene | Sphere and Cylinder | How the scene is managed for physics, colors, units and other related settings |
| World | globe icon | Handles the sky and how the world looks |
| Object | orange cube | Object tab, very important for managing object settings through rotation, scale and location of the currently selected object. This determines all aspects of the object |
| Object Constraints | Chain | Add constraints to how an object can act and follow other elements in the scene. |
| Modifiers Tab | Wrench | Blender is a modifier based software. This tab determines how to edit objects with powerful tools such as mirror, subdivision subsurface, decimate, array, and many others. These will modify mesh and are powerful for mesh, animation, rigging and simulation. |
| Data Mesh Tab | Triangle | Determines how the mesh, UV mapping, and texture is managed for an object. |
| Material Tab | Circle with square pattern | Determines how materials are applied to an object |
| Texture Tab | Checkered Square | Determines how images are linked to the materials of the object. |
| Particles Tab | Sparkles | Determines the particle effects |
| Physics | Bouncing Ball | An interface to adjust how physics is managed for the scene |
Timeline

This is all about animation. To play the animation, hit the play button. This panel can be navigated by moving the line with the cursor or holding alt and scrolling.
Adding and Removing Panels
As mentioned earlier, the blender view is made up of different panels. Each panel has a small triangle at the top right and bottom left corners. If you want to change the size of a panel, move the cursor to the edge of the panel and drag the arrow marker in the direction that you with to extend or shrink the panel. You can Drag a corner into its own panel to duplicate it. To remove a panel Drag one triangle from an adjacent panel over the panel you want to remove (this will make an arrow appear over the panel about to be removed). You can only remove a panel if it shares an edge fully with another panel.
To change the view of a panel, select the dropdown icon in the bottom left of the panel and select the new view you wish to see.
To reset the current layout of the screen select the dropdown icon to the right of Help at the top of the screen. This tutorial was all done using the default layout.
Exercise

As an attempt to test what you have learned in this tutorial, attempt to make a scene that looks like this, shannon (monkey mesh) with a hat as in the image agove.
Conclusion
That is a very basic overview of the 3d view area and how to navigate it. These same tools of how to navigate the scene and manipulate objects are also used when creating meshes and editing almost anything about a 3d object.
Just as that scene I showed earlier was made up of a set of objects, a mesh is composed of a set of points, edges and faces and can be edited in the same manner using the same tools.